
ComfyUI Manager handles the routine work of adding, updating, disabling, and removing custom nodes in ComfyUI. On Windows, the installation steps depend on whether you use Comfy Desktop, the Windows portable package, or a manual Python installation.
This guide covers ComfyUI, custom nodes, and the features provided by ComfyUI Manager. It then walks through enabling Manager on each Windows setup and covers common path, dependency, and restart problems.
Table of contents
- What is ComfyUI?
- Where to download ComfyUI
- What is a custom node in ComfyUI?
- What is ComfyUI Manager?
- What ComfyUI Manager can do
- Which Windows installation method should you use?
- Install ComfyUI Manager on Comfy Desktop
- Install ComfyUI Manager on Windows Portable
- Install ComfyUI Manager with a manual ComfyUI installation
- Legacy Git installation for an existing ComfyUI server
- How to use ComfyUI Manager to install custom nodes
- How to update, disable, or remove custom nodes
- Windows troubleshooting
- Useful PixelAiLabs guides
- FAQ
- Conclusion
What is ComfyUI?
ComfyUI is a modular interface and backend for building AI image, video, audio, and 3D generation workflows. Rather than hiding the process behind one prompt box, it represents a workflow as a graph of connected nodes.
Each node handles a task. One can load a model, another can encode a prompt, another can sample an image, and another can save the result. You connect these operations into a graph, then run the graph as a workflow.
This gives you control over model files, prompts, seeds, samplers, image sizes, video settings, and output locations. ComfyUI can also load complete workflows from JSON files and from generated PNG, WebP, and FLAC files that contain workflow metadata.
The project supports many current open models and runs locally on Windows, Linux, and macOS. It can also run in the cloud. For a local Windows installation, the main choices are Comfy Desktop, the Windows portable package, and a manual installation.
Where to download ComfyUI
Use one of these official sources:
- ComfyUI on GitHub
- ComfyUI download page
- ComfyUI Windows Desktop documentation
- ComfyUI Windows Portable documentation
- ComfyUI manual installation documentation
When possible, download ComfyUI from the official repository or download page instead of an unofficial repackaging site. This gives you the expected folder layout, current launcher, and official update path.
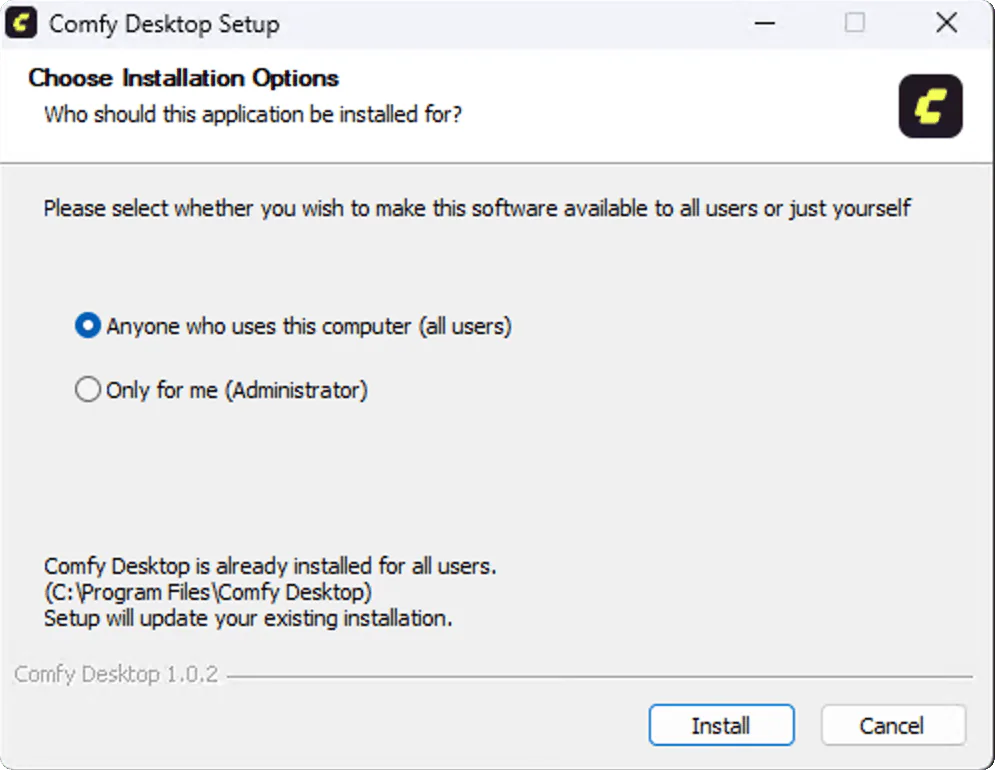
The official Comfy Desktop documentation includes a Windows installation screen. Image source: ComfyUI Windows documentation.
What is a custom node in ComfyUI?
A custom node is a community-created extension that adds functionality to ComfyUI. ComfyUI includes built-in nodes maintained as part of Comfy Core. Independent developers or organizations publish custom nodes separately.
A custom node pack might add:
- A model loader that is not included in the core installation
- Extra image, video, masking, or upscaling operations
- LoRA, ControlNet, or conditioning tools
- Utility nodes for prompts, file management, or batch generation
- Connections to external services and APIs
- New workflow interfaces for a specific model
Custom nodes usually come from a Git repository and may include a requirements.txt, install.py, or other package metadata. These files tell ComfyUI or its installer which Python dependencies the node needs.
The ComfyUI custom node documentation explains the difference between built-in nodes and community nodes. It also covers installation, dependencies, version control, disabling, and uninstalling.
Custom nodes are useful, but they are third-party code. Read the repository instructions, check its license, and install only extensions you trust. A node can fail because of a missing dependency, a version conflict, an outdated API, or a change in ComfyUI itself.
What is ComfyUI Manager?
ComfyUI Manager is an extension for managing ComfyUI custom nodes. The Comfy-Org organization now maintains the project. Newer Desktop and non-Desktop installations include Manager, although some installations still require you to enable it or use an older Git-based installation.
Manager provides a graphical way to find and manage extensions, so you do not have to open a terminal for every repository. Depending on your ComfyUI version and security settings, it can install, update, disable, enable, and remove custom nodes. It can also help identify missing nodes required by a workflow.
In the interface, the feature may appear as Manager, Extension Management, or a plugin-style button. The exact label depends on the frontend and Manager interface version.

The Manager button appears in the ComfyUI interface. Image source: ComfyUI extension tutorials.
What ComfyUI Manager can do
The Manager interface covers several common ComfyUI tasks.
Install custom nodes
Search the available node registry or channel, review a package, and select Install. Manager can clone the repository and install the package dependencies in the ComfyUI environment.
Install missing nodes from a workflow
When you open a workflow that uses nodes you do not have, Manager can show an Install Missing Custom Nodes option. This is often faster than searching for each missing node yourself.
Update extensions
Manager can fetch update information and update installed custom nodes. You usually need to restart ComfyUI before the updated code loads.
Disable or enable nodes
Temporarily disabling a node pack helps when you are debugging a startup failure or dependency conflict. You can test ComfyUI without deleting the extension.
Remove extensions
Manager can remove installed node packs. Keep a copy of important workflows before removing a package, since another workflow may depend on it.
Save and restore snapshots
Manager includes snapshot features that record the installation state of custom nodes. A snapshot can help you return to a working setup after an update, although support is incomplete for some non-Git installations.
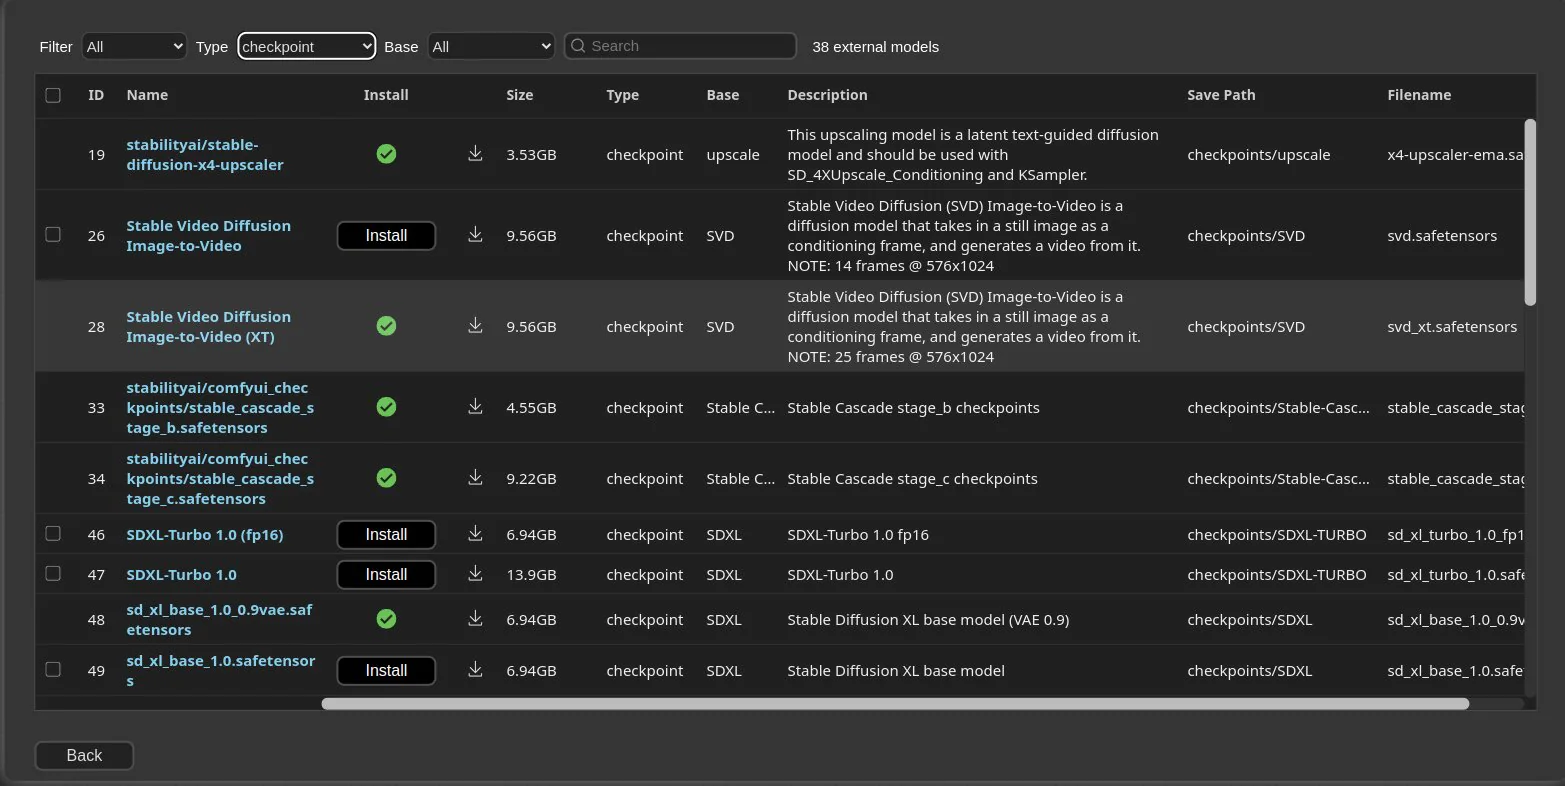
Review node and model information
Manager uses registry and channel data to show available extensions and related information. The results depend on the selected database mode, network access, channel, and the package's registration status.
The Manager extension also includes workflow sharing controls. Image source: ComfyUI extension tutorials.
Which Windows installation method should you use?
Choose the row that matches your setup:
| Your ComfyUI setup | What to do |
|---|---|
| Comfy Desktop | Manager is included and enabled by default. No separate Manager install is required. |
| Windows Portable | Install the Manager dependencies with the embedded Python and launch ComfyUI with --enable-manager. |
| Manual Python installation | Activate your virtual environment, install manager_requirements.txt, and launch with --enable-manager. |
| Older server or legacy installation | Clone the Manager repository into ComfyUI/custom_nodes, install its requirements, and restart. |
Close ComfyUI before changing files or installing dependencies. If the application keeps running while files are updated, the installation can be incomplete or the Manager process can continue using old code.
Install ComfyUI Manager on Comfy Desktop
Comfy Desktop is the simplest Windows path. According to the official Manager installation documentation, ComfyUI Manager is already included and enabled by default in Comfy Desktop.
Steps
- Install Comfy Desktop from the official Windows download page.
- Open Comfy Desktop and launch your ComfyUI installation.
- Look for Manager, Extension Management, or the plugin button in the interface.
- Open the Manager panel and search for a custom node.
- Select Install and follow any prompts.
- Restart ComfyUI after the installation completes.
If the Manager panel is missing, update Comfy Desktop first. The interface can change between releases. You can also check Desktop settings for a legacy Manager interface option, but the current interface is the preferred starting point.
You do not need to clone the Manager repository manually into a Desktop installation unless the official documentation for your specific version tells you to do so.
Install ComfyUI Manager on Windows Portable
The current portable method uses the Manager code included in ComfyUI core. Install the Manager dependencies with the portable Python runtime, then start ComfyUI with the Manager flag.
1. Close ComfyUI
Exit ComfyUI and close any command window that is still running it.
2. Open a terminal in the portable folder
Find the folder that contains both ComfyUI and python_embeded. A typical layout looks like this:
D:\ComfyUI_windows_portable\
├── ComfyUI\
└── python_embeded\
Open Command Prompt in that folder. In File Explorer, click the address bar, type cmd, and press Enter. You can also use cd:
cd /d D:\ComfyUI_windows_portable
Replace the example path with the folder on your computer.
3. Install Manager dependencies
Run this command from the portable folder:
python_embeded\python.exe -m pip install -r ComfyUI\manager_requirements.txt
This command uses the Python bundled with ComfyUI. That matters because installing packages into your system Python does not install them into the embedded environment used by the portable build.
4. Enable Manager when starting ComfyUI
Run:
python_embeded\python.exe -s ComfyUI\main.py --windows-standalone-build --enable-manager
If you normally start ComfyUI with a batch file, add --enable-manager to the existing launch command instead. Keep the other hardware or performance flags already used by your installation.
5. Confirm that Manager loaded
Open the ComfyUI address shown in the command window. Find Manager or Extension Management in the interface. Open it and search for a small, well-known custom node before installing a larger package.
Portable alternative: the Manager installation batch file
The Manager repository also documents a portable-only batch installer:
- Install Git for Windows.
- Download
install-manager-for-portable-version.bat. - Save it inside the
ComfyUI_windows_portablefolder. - Double-click the batch file.
- Start ComfyUI again.
Use Save link as when downloading the .bat file. Do not open the raw file in the browser and save an HTML page with a .bat extension.
The dependency and flag method above follows the current ComfyUI documentation for portable installations. The batch script is useful when you want the Manager repository's documented portable setup helper.
Install ComfyUI Manager with a manual ComfyUI installation
A manual installation normally has a Python virtual environment, often named venv. The exact environment name can differ, so use the one created during your ComfyUI setup.
1. Open a terminal in the ComfyUI folder
cd /d D:\ComfyUI
2. Activate the virtual environment
If your environment is called venv, run:
venv\Scripts\activate
Your prompt should show the activated environment. If you use a different environment name, replace venv in the command.
3. Install Manager dependencies
pip install -r manager_requirements.txt
Run this command while the ComfyUI environment is active. Installing the requirements into a different system Python is a common reason Manager appears to install successfully but fails at startup.
4. Start ComfyUI with Manager enabled
python main.py --enable-manager
The official documentation also supports these flags:
--enable-manager
--enable-manager-legacy-ui
--disable-manager-ui
Use --enable-manager-legacy-ui only when you specifically need the older interface. Do not use --disable-manager-ui if you want the Manager panel in the browser.
5. Restart after installing a node
Once Manager is working, install additional custom nodes from the interface. Restart ComfyUI after node installation or updates so Python can load the new extension code.
Legacy Git installation for an existing ComfyUI server
Some older or custom server installations still use ComfyUI Manager as a separate custom node. If your installation does not include the current Manager code, use the Git method documented by ComfyUI.
1. Install Git for Windows
Download Git from git-scm.com/download/win. Verify it from Command Prompt:
git --version
If Windows says that git is not recognized, restart the terminal after installing Git. If it still fails, repair the Git installation and make sure Git was added to your PATH.
2. Open the custom_nodes directory
For a portable installation at D:\ComfyUI_windows_portable, run:
cd /d D:\ComfyUI_windows_portable\ComfyUI\custom_nodes
For a manual installation, use the custom_nodes directory inside your ComfyUI folder.
3. Clone the repository
git clone https://github.com/Comfy-Org/ComfyUI-Manager.git comfyui-manager
The final folder should be:
ComfyUI\custom_nodes\comfyui-manager
Do not place the Manager files directly inside custom_nodes. Also avoid nested paths such as:
ComfyUI\custom_nodes\ComfyUI-Manager\ComfyUI-Manager
ComfyUI\custom_nodes\ComfyUI-Manager-main
Those layouts can prevent updates or create duplicate installations.
4. Install requirements for the legacy clone
From the cloned folder, run the requirement command in the Python environment used by ComfyUI:
cd comfyui-manager
pip install -r requirements.txt
For a portable installation, use the embedded Python instead:
D:\ComfyUI_windows_portable\python_embeded\python.exe -m pip install -r requirements.txt
5. Restart ComfyUI
Start ComfyUI again and look for Manager in the interface. If the old clone conflicts with a newer built-in Manager, remove the duplicate installation and follow the current installation method for your ComfyUI version.
How to use ComfyUI Manager to install custom nodes
After Manager is available, use it as your regular extension installer.
- Open ComfyUI in your browser.
- Select Manager or Extension Management.
- Choose Install Custom Nodes.
- Search for the node pack by name.
- Review the repository, author, description, and required dependencies.
- Select Install or Try Install when the package is not fully registered.
- Wait for the install process to finish.
- Restart ComfyUI.
- Search for the new node in the node menu.
Manager may use a cached channel, local data, or a remote channel. A remote channel can provide newer information, while local data may still be available when network access fails. If a package is missing from the list, confirm the spelling, check the repository directly, and use the manual Git method only when you trust the source.
If you open a workflow with missing nodes, use Install Missing Custom Nodes when it is available. Confirm each proposed package before installing it. A node name alone does not establish that two packages are safe substitutes.
How to update, disable, or remove custom nodes
Update a node pack
Open Manager, fetch the available updates, select the node pack, and choose Update. Restart ComfyUI after the update. If the update introduces a new dependency, Manager may install it during the process.
Disable a node pack
Use the installed-node management screen and choose the disable option for the extension. Restart ComfyUI and test the workflow again. This is safer than deleting a node pack while you are diagnosing a problem.
Remove a node pack
Remove the extension from Manager, restart ComfyUI, and check the workflow for missing nodes. Keep backups of important workflow JSON files before removing extensions.
Save a snapshot first
Before updating several custom nodes at once, save a Manager snapshot if the option is available in your installation. A snapshot records the installation state and can help restore a previous setup. The official Manager documentation notes that snapshot support is incomplete for some non-Git installations.
Windows troubleshooting
Manager does not appear
Check the installation type first. Desktop includes Manager by default. Portable and manual installations need --enable-manager. Confirm that the launch command you actually use contains the flag, then restart ComfyUI.
Dependencies installed into the wrong Python
Portable builds must use:
python_embeded\python.exe -m pip install -r ComfyUI\manager_requirements.txt
Manual installations must use the activated ComfyUI virtual environment. A system-level pip install may leave the ComfyUI runtime unable to import the package.
Git is not recognized
Run git --version. If the command fails, install Git for Windows, close the terminal, open a new one, and try again. The new terminal is needed so Windows reloads the PATH changes.
The node installed but does not load
Restart ComfyUI first. Then read the command window or ComfyUI log for the first import error. The likely causes are a missing dependency, an incompatible package version, a conflicting node, or a model file that the node expects separately.
A workflow still has missing nodes
Use Install Missing Custom Nodes and review the proposed packages. If Manager cannot identify a node, search the node class name in the workflow JSON or inspect the workflow's original download page. Do not install random repositories with similar names.
Manager updates fail
Make sure the installation is a Git checkout rather than a ZIP folder with nested directories. Check that Git can reach GitHub, that the ComfyUI folder is writable, and that you are not running two ComfyUI installations with different Manager folders.
Windows event-loop or certificate errors
The Manager repository documents Windows-specific configuration options for some errors, including windows_selector_event_loop_policy = True for an overlapped-object event-loop error and bypass_ssl = True for certificate verification problems. Use these only when the matching error appears, and review the security implications before bypassing certificate checks.
Useful PixelAiLabs guides
These PixelAiLabs resources can help once Manager is working:
- PixelAiLabs ComfyUI workflows
- Batch generate AI model images with ComfyUI
- Flux Dev with low VRAM in ComfyUI
- WSL ComfyUI and CatVTON installation guide
- Training custom LoRAs for video models
FAQ
Is ComfyUI Manager included with ComfyUI?
In current Comfy Desktop installations, Manager is included and enabled by default. In current portable and manual installations, the Manager code is included in ComfyUI core, but you still need to install its dependencies and launch ComfyUI with --enable-manager. Older installations may use the separate Git-based custom node.
Do I need Git to use ComfyUI Manager?
You do not normally need to clone the Manager repository when using Comfy Desktop or the current portable and manual methods. Git is required for the legacy clone method and is useful when a package must be installed from a repository URL.
Where should ComfyUI Manager be installed?
For the legacy custom-node method, the repository belongs at ComfyUI\custom_nodes\comfyui-manager. Do not put its files directly in custom_nodes or create an extra nested directory.
Does ComfyUI Manager install model files?
Manager can expose model-related functions in some versions, but a custom node install does not automatically provide every model file required by a workflow. Read the workflow and model documentation separately and verify model licenses before commercial use.
Is every custom node safe?
No. Custom nodes are third-party code. Check the source repository, release history, requirements, and license before installing. Keep backups and use snapshots before large updates.
Conclusion
ComfyUI Manager removes much of the repetitive terminal work involved in managing custom nodes. The Windows steps depend on your ComfyUI installation type:
- Comfy Desktop already includes and enables Manager.
- Windows Portable uses the embedded Python and the
--enable-managerlaunch flag. - Manual installations use the active virtual environment,
manager_requirements.txt, and the same launch flag. - Older installations can use the Git clone method in
ComfyUI\custom_nodes\comfyui-manager.
Once Manager is running, start with one trusted extension, restart ComfyUI, and save a snapshot before larger updates. This makes ComfyUI workflows easier to build and maintain on Windows.